Tuesday, 6 December 2011

Shutdown stalls using HAST + ZFS

I've been playing around with hast and zfs which is pretty neat.

However, I have found a problem where if you try to restart a host that is running HAST as a primary node with a mounted zpool the server fails to complete the shutdown process and requires a hard reset.

You can fix this by modifying the HAST init script and force it to unmount any zfs filesystems before stopping HAST.

vi /etc/rc.d/hastd


hastd_stop_precmd()
{
        zfs unmount -a
${hastctl} role init all
}

After adding the zfs unmount command into the hastd_stop_precmd section as shown above you should be able to safely restart your system

Note: If you do a csup at any point this change could be overwritten so take care. Also, be aware that this will unmount all zfs filesystems, if you need to only unmount a specific filesystem then you should modify the unmount command accordingly.

Saturday, 3 December 2011

Skyrim

My son is a big Elder Scrolls fan so as soon as Skyrim was released he was on it like fleas on a dog. He kept telling me all about it and didn't appear to have any issues so I broke a long standing rule of mine and actually purchased a new release game for the first time in 5 years or more.

I played for about 40 hours with us chatting via Steam chat and apart from about 3 spontaneous crashes to the desktop and one dungeon (Bonechill Passage) that I had to navigate by walking backwards (otherwise it would crash every time a baddy saw me) I didn't have a lot of trouble with it.

Less trouble than you normally get from a damned Bethesda game anyway.

Then along came the 1.2 patch which purported to fix a whole lot of bugs that I wasn't seeing.

What an unmitigated disaster.

Now, Skyrim is totally unplayable.

For some reason, every time I fire an arrow the game hangs, requiring it to be killed in task manager.

Every. Single. Time.

This sucks because my level 15 wood elf has zero magic skills and is built entirely around sneak and archery.

I've tried reverting to an older save. This seemed to fix it for a bit, until I entered a dungeon, where I attempted to fire off an arrow and, yes, you guessed, lock up city again.

This is fricking ridiculous.

I removed Skyrim from Steam and reinstalled it. First I tried to install it with Steam offline to ensure that the update wasn't slurped down again but of course you can't install a game from DVD while offline because the goddam DRM won't allow it.

Fuckwits.

So, I had to install with Steam online which I did. In order to ensure that the patch wasn't installed I went into Skyrim properties and set it to NOT download updates while the install was going.

The install takes about half an hour, during which time I got distracted (I can only watch a progress bar for so long before I get bored)

When I noticed that the DVD activity LED was no longer showing any activity I jumped back to Steam only to find WTF?, the fricking patch has started downloading and there is no way that it can be stopped.

Skyrim simply refuses to start until the patch has installed.

What the FUCK? Am I playing Battlefield 3 here? A multiplayer game where it is important that all the players are on the same version of code?

No I am NOT.

This is a single player game and it is MY goddam computer. I should decide what version of code to run not some ASSHAT who works at a computer game company.

I've got a good mind to take this game back for a refund and find a pirate version at the bloody pirate bay.

I hate the way the game industry has become over the last 30 years.

UPDATE: Eventually a fix for the fix came out and most of the major problems went away. I still had to start a new character and my complaints regarding the DRM and forced installs of patches still stand however.

Tuesday, 22 November 2011

Update FreeBSD Sources and Rebuild World

To update your source tree and rebuild your kernel to ensure it matches the sources follow these steps.

Copy the sample supfile to /root;

# cp /usr/share/examples/cvsup/standard-supfile ~

Edit the supfile and change the line that says;

*default host=CHANGE_THIS.FreeBSD.org
So that it points to a server that is local to you. On mine I use the au mirror;
*default host=cvsup.au.freebsd.org
If you already have a working supfile, ensure it contains a line;

# src-all

Execute csup to download the kernel sources;

# csup ~/standard-supfile

Compile everything;

# cd /usr/src
# make buildworld
# make buildkernel


Install the new kernel;

# make installkernel

Reboot into single user mode;

# init 6

In single user mode execute these commands;

# adjkerntz -i
# mount -a -t ufs
# mergemaster -p
# cd /usr/src
# make installworld
# mergemaster


Reboot;
# init 6

This was lifted from the FreeBSD documentation;

http://www.freebsd.org/doc/handbook/makeworld.html

Friday, 18 November 2011

Installing VirtualBox OSE in FreeBSD 9

Installing VirtualBox from the FreeBSD ports tree is not as straightforward as you may expect.

You may in fact hit a couple of snags. The first one is that you are required to have the FreeBSD kernel source installed or else it will stop while trying to compile the network drivers.

The second is an incompatibility between VirtualBox and the newer kernels which results in the following error during compilation;

error: 'D_PSEUDO' undeclared here (not in a function)

Perform the following steps as the root user to get Vbox installed.

First, you need to install the kernel sources and rebuild your world and kernel;

Once done, login again as root and change to the directory for the virtualbox-ose port;

cd /usr/ports/emulators/virtualbox-ose

This port will install virtualbox-ose-kmod as a dependency which is where the error causing the error shown above is hiding.

We need to edit one of the source files before we attempt to compile;

# vi ../virtualbox-ose-kmod/work/VirtualBox-4.0.12_OSE/out/freebsd.amd64/release/bin/src/vboxdrv/freebsd/SUPDrv-freebsd.c

On or about line 104 you will see the following C code;

#if __FreeBSD_version > 800061
    .d_flags =          D_PSEUDO | D_TRACKCLOSE | D_NEEDMINOR,
#else
    .d_flags =          D_PSEUDO | D_TRACKCLOSE,
#endif


Change it, removing the D_PSUEDO flag so it looks like this;


#if __FreeBSD_version > 800061
    .d_flags =          D_TRACKCLOSE | D_NEEDMINOR,
#else
    .d_flags =         
D_PSEUDO | D_TRACKCLOSE,
#endif


Now, we are ready to do a normal build of virtualbox;

make install clean


Use these configure options 

To allow VirtualBox access to hardware such as CD/DVD drives you should also install HALD;

cd /usr/ports/sysutils/hal

make install clean


Create /boot/loader.conf and add these lines;

atapicam_load="YES"
vboxdrv_load="YES"


Add these options to your /etc/rc.conf;

vboxnet_enable="YES" # Enable virtualbox
hald_enable="YES" # Required to allow virtualbox to access CDROM device
dbus_enable="YES" # Required by hald


Add these lines to /etc/devfs.conf:

own     vboxnetctl  root:vboxusers
perm    vboxnetctl  0660
perm  cd0   0660
perm  xpt0   0660
perm  pass0   0660


Add all users that need virtualbox to the vboxusers group:

# pw groupmod vboxusers -m username

Finally, reboot the machine;

init 6

Using ZFS on FreeBSD 9

I've decided to retire my Ubuntu based NAS and reload it with FreeBSD so that I can use ZFS.

I wanted to use ZFS deduplication which means that ZFS version 23 or later is required.

Since the upcoming FreeBSD 9 has ZFS v28 I decided to go with that, even though it is still only an RC.

I'm not going to boot off ZFS so there is no need to muck about trying to get that to work, although I believe it can be done.

Maybe another day.

So, I just did a vanilla FreeBSD install to my OCZ SSD and ignored the remaining drives in my server for now.

Once FreeBSD is installed, log in as root and do the following to create some ZFS "pools".

First, you need to identify the hard disks devices that are installed in your system;

# dmesg | grep ad | grep device
ada0: <OCZ 02.10104> ATA-8 SATA 2.x device
ada1: <SAMSUNG 1AA01113> ATA-7 SATA 2.x device
ada2: <ST32000542AS> ATA-8 SATA 2.x device
ada3: <ST32000542AS> ATA-8 SATA 2.x device

ada0 is my system drive which I will ignore.

The Samsung drive is a 1GB drive that I use for non critical stuff while the two ST32000 Seagates are 2TB drives that I will use to create my main pool for a total 4TB capacity.

Creating a ZFS pool is super easy. Lets' create a zpool called "store" out of the 2 x Seagates;

# zpool create store ada2 ada3

We can take a look at our pool;

# zpool list
NAME    SIZE  ALLOC   FREE    CAP  DEDUP  HEALTH  ALTROOT
store  3.62T  0.00T   3.62T    0%  1.00x  ONLINE  -


To get a more detailed report, use the "status" command;

# zpool status
  pool: store
 state: ONLINE
 scan: none requested
config:

    NAME        STATE     READ WRITE CKSUM
    store       ONLINE       0     0     0
      ada2      ONLINE       0     0     0
      ada3      ONLINE       0     0     0

errors: No known data errors


If I had wanted to make a mirror from my two Seagates, I simply add the raidz parameter;

zpool create raidz store ada2 ada3

So, presently I have a ZFS pool, which already has a default filesystem. There is no need to do a mkfs. You can see that it is mounted using the df command;

# df -h
Filesystem       Size    Used   Avail Capacity  Mounted on
/dev/ada0p2       55G     21G     29G    42%    /
devfs            1.0k    1.0k      0B   100%    /dev
store            3.4T    1.0k    3.4T     0%    /store


Normally, you would not just start dumping files straight onto the pool (which you can do if you really want to), but instead you create another filesystem to store your files in. You do this with the "zfs" command.

# zfs create store/archive

Check your mounted filesystems again;

# df -h
Filesystem       Size    Used   Avail Capacity  Mounted on
/dev/ada0p2       55G     21G     29G    42%    /
devfs            1.0k    1.0k      0B   100%    /dev
store            3.4T    1.0k    3.4T     0%    /store
store/archive    3.4T    1.0k    3.4T     0%    /store/archive


Now, one of the reasons for using ZFS is to use ZFS's deduplication and compression features. Let's turn those on;

# zfs set dedup=on store/archive
# zfs set compression=on store/archive


You could apply those commands directly to the pool if you like. When dedup is applied to the pool then the deduplication process applies to all filesystems within the pool.

Another neat thing about ZFS is how easy it is to share a filesystem using nfs. Of course NFS must be enabled on your system in /etc/rc.conf for this to work.

With NFS enabled, let's share store/archive;

zfs sharenfs="-maproot=0:0" store/archive

Unlike with "normal" NFS there is no need to restart any services after issuing this command, although you should note that is not recommended that you mix "normal" NFS (ie: /etc/exports) with ZFS controlled NFS.

In other words, keep your /etc/exports file empty.

My archive filesystem is now shared, but it is open to everybody. Usually I don't care about that at home but in other scenarios you may wish to restrict access to certain networks;

# zfs sharenfs="-maproot=0:0 -network 10.1.1.0 -mask 255.255.255.0" store/archive

You can see your existing exports by viewing the /etc/zfs/exports file;

# cat /etc/zfs/exports
# !!! DO NOT EDIT THIS FILE MANUALLY !!!

/store/archive    -maproot=0:0


You can get a whole bunch of stuff with this command;

# zfs get all store/archive
NAME           PROPERTY              VALUE                  SOURCE
store/archive  type                  filesystem             -
store/archive  creation              Mon Oct 31 10:39 2011  -
store/archive  used                  0.00K                  -
store/archive  available             3.4T                   -
store/archive  referenced            0.00K                  -
store/archive  compressratio         1.00x                  -
store/archive  mounted               yes                    -
store/archive  quota                 none                   default
store/archive  reservation           none                   default
store/archive  recordsize            128K                   default
store/archive  mountpoint            /store/archive         default
store/archive  sharenfs              -maproot=0:0           local
store/archive  checksum              on                     default
store/archive  compression           on                     local
store/archive  atime                 on                     default
store/archive  devices               on                     default
store/archive  exec                  on                     default
store/archive  setuid                on                     default
store/archive  readonly              off                    default
store/archive  jailed                off                    default
store/archive  snapdir               hidden                 default
store/archive  aclmode               discard                default
store/archive  aclinherit            restricted             default
store/archive  canmount              on                     default
store/archive  xattr                 off                    temporary
store/archive  copies                1                      default
store/archive  version               5                      -
store/archive  utf8only              off                    -
store/archive  normalization         none                   -
store/archive  casesensitivity       sensitive              -
store/archive  vscan                 off                    default
store/archive  nbmand                off                    default
store/archive  sharesmb              off                    default
store/archive  refquota              none                   default
store/archive  refreservation        none                   default
store/archive  primarycache          all                    default
store/archive  secondarycache        all                    default
store/archive  usedbysnapshots       0                      -
store/archive  usedbydataset         0.00K                  -
store/archive  usedbychildren        0                      -
store/archive  usedbyrefreservation  0                      -
store/archive  logbias               latency                default
store/archive  dedup                 on                     local
store/archive  mlslabel                                     -
store/archive  sync                  standard               default
store/archive  refcompressratio      1.00x


Finally, the list command will display all your ZFS filesystems;

# zfs list
NAME            USED  AVAIL  REFER  MOUNTPOINT
store          5.46T   841G  2.60T  /store
store/archive  2.70T   841G  2.70T  /store/archive


You may have noticed the numbers in the above grab and wonder "what's that?" My store pool has 5.46T used but it only has a capacity of 3.6T! What gives?

Well, this command was issued after loading a whole bunch of files to the NAS and it just so happens that there are a lot of duplicates on there. The zfs list command shows you the total amount of space used as it appears to the operating system as opposed to the actual amount used on the disk.

If I issue the zpool list command I can see how much of my disk is deduped;

# zpool list
NAME    SIZE  ALLOC   FREE    CAP  DEDUP  HEALTH  ALTROOT
store  3.62T  2.70T   942G    74%  2.02x  ONLINE  -


From this we can see that my dedup ratio is 2.02. This is abnormally high however, you should expect a much lower value than that in typical usage scenarios.

So, that's the basics of ZFS, enjoy!

Tuesday, 8 November 2011

Creating an MX record using the NetRegistry Zonemanager

I've just spent a frustrating couple of hours struggling to get an MX record to resolve using the NetRegistry "Zonemanager" (netregistry.com).

If you have domains hosted on NetRegistry then you must use their "Zonemanager" web interface to create and update DNS records.


The trouble is, if you try to save that page (see above, using the unhelpfully labeled "Edit Record" button) then it will fail because it does not like the trailling fullstop on the text in the "Name" field.

If you remove the full stop then the update will "work", except that the MX actually  fail to resolve when you test it. Even after waiting for some hours for the change to propagate.

The confusion occurs because, in fact, putting anything in the "Name" field will cause your MX record to fail.

This is not indicated anywhere in the help, user feedback or error messages that are provided.

It turns out that what you need to do is leave the "Name" field completely empty which then causes the "smoke and mirrors" function within Zonemanager to create a record that includes the magical domain name with the trailing full stop entry.

Here is what the "Edit MX record" page looks like for a good MX entry.


I'm not even sure what that entry means, because when I set up an MX using bind the MX line has no entry at all in that furthest to the left position.

Anyway, fill your form out like this and it should be OK. The "Is Host Fully Qualified" tickbox doesn't seem to do anything.


This is how you should create an MX record using Netregistry Zonemanager.

Tuesday, 27 September 2011

MS To Use Secure Boot "Feature" To Reinforce Windows Lock-in

"A senior Red Hat engineer has lashed back at Microsoft's attempt to downplay concerns that upcoming secure boot features will make it impossible to install Linux on Windows 8 certified systems"

The Register September 26 2011

Without any doubt, Microsoft are the second most evil company in the world (after Monsanto)

Things that would be fatally damning for most other companies are constantly made public about MS and they continue on unchecked.

On the exceedingly rare occasion that they get prosecuted for something they simply throw a few "free" Windows + Office" licenses at the education institutions in the complaining jurisdiction and their troubles magically disappear.

The U.S. Government won't touch them because the U.S. has only 2 industries of any worth left, Tech and pop culture media.

These are the only things that the U.S. still has the ability to sell to the world, and it is no coincidence that these two industries are given complete freedom to screw everyone over in order to maintain their dominant positions in their respective markets.

Should the likes of MS, Oracle and Apple fall along with the MPAA and RIAA members then the USA would be truly irrelevant to 95% of the planet.

I'm sure their politicians are aware of this and thus they allow them to get away with anti-consumer practices across the board in order to retain their relevance in world markets.

All is not lost however because it is a negative strategy and ultimately negative strategies are destined to fail.

Despite their best efforts to use hostile litigation and anti-competitive lock-in strategies to keep at the top of the heap, eventually others will come along who offer better products with less pent up antagonism directed at them.

People increasingly come to resent being harassed, dictated to and having their choices removed for the benefit of corporate profiteers in another country.

People no longer *like* Microsoft, or their products. They associate them with boring jobs, and having to wait for ages while the crappy slow corp PC they have on their desk reboots after a crash . Even longer for patch Tuesday, not that they know what patch Tuesday is.

Microsoft and Windows are not cool. There is no "wow, I must get the new Windows phone" factor at play and the few remaining OS fanboys that are out there are not enough to sustain a corporation that is the size of the Beast of Redmond. On top of that, most of the OS fanboys have the ability (and willingness) to pirate their copies of Windows Ultimate Whizbang Professional Edition anyway.

If Microsoft do manage to achieve what they are trying to do with this latest lock-in gambit then they will just cause even greater dissent within their existing customer base and increase the rate of user defections to other forms of computing, such as tablets and such.

The thing that killed the netbook was MS and Intel trying to dictate to the OEMs what they could and couldn't build when it came to the Atom based laptops, known as "Netbooks".

In their arrogance they just assumed that everybody had no choice but to purchase PC's, and by creating a set of artificial limitations they could thereby force people to purchase PC's with a more expensive processor and OS just so they could get what they actually wanted, which was usually just a bit bigger screen.

Of course this strategy failed spectacularly and simply left a gaping hole in the market in which Apple promptly shoved the ipad to great success.

If MS succeed in their aims they will just push more people to purchase things other than PC's.

In fact, it is intel who should feel most scared by this. If MS succeed in tying x86 hardware to Windows alone then it will be the ARM vendors who will rush in to take up the slack.

I'm yet to be convinced that MS will be successful in their efforts to port their full Windows + Office stack to ARM so ARM makers would have no reason at all to yield to MS threats and lock their hardware to Windows.

Even if MS do succeed in getting Windows on to ARM, I doubt very much that most of the ARM vendors would be silly enough to listen to such threats anyway as it would mean cutting off what is currently 100% of their market in order to sell in a new market (Windows) which is completely unproven up to this point.

MS will fail. Every time they try one of the tricks that worked for them in the 90's they will find that those tricks no longer work in the more mature market of today.

They remind me of Bart Simpson on that episode where Lisa was using him as a psyche test subject with the electrified cupcake.

Hmmm, cupcake, OUCH!!!

grrrr

Hmmm, cupcake, OUCH!!!

grrrr

Hmmm, cupcake, OUCH!!!

grrrr

Monday, 29 August 2011

10 Reasons Why Itunes is Utterly Crap

I have an iphone 4. I like it. It is, in fact, the best damned phone I've ever owned. I have always hated Nokia phones. My Moto Razor V3 was good but the iphone is great.

Unfortunately, the iphone is saddled with itunes, making it far less attractive to me.

Here are some of the things that drive me batshit insane about itunes on Windows.

1) I have an ipod and an iphone. Stupidly, itunes cannot handle multiple devices, forcing you to use different Windows user profiles for each device as a workaround.

2) Itunes compounds that retardedness by not allowing you to have itunes open in two user profiles at the same time.

3) The latest Iphone software update is 666.6 megabytes! This is not directly a factor in itunes sucking but read on . . .

4) Despite such a ludicrous download size, you cannot pause downloads and restart them later, despite there being an option that suggests otherwise. Clicking pause immediately resets the download to 0/666 forcing you to restart from scratch.

5) Now, after four hours of downloading the update fails with nonsense "error -3259". This occurs on Windows 7 and Windows XP. Every. Single. Time.

6) Idiotically temperamental handling of a music library which resides on a network share. If the share is not up at any point all your music is "lost" until you re-add them again.

7) Itunes is incredibly resource hungry, to the point that when syncing a phone itunes becomes unusable. Making things worse is that if you happen to minimise itunes, it then stays minimised for the duration of the sync after which you cannot see the progress.

8) Itunes freaks out with large libraries. It can take literally hours figuring out what files require syncing, and that is before actually starting the sync! How are you meant to handle a 160Gb ipod when itunes freaks out at around 20Gb?

9) If you happen to combine issue 7 and 8 you start wondering whether itunes might have crashed after an hour or more of "sync in progress" on your phone and nothing but an unresponsive mess from itunes itself.

10) Stupid skin job on Windoze version to make it look like it is running on a mac. If I wanted a mac I would buy a mac. If you really want to be my friend make a (non succky) version of itunes for Linux.


God I hate itunes.

Next time around its an android phone for me, and that is purely down to the complete and utter shiteness that is itunes.

I don't have a problem with my iphone, but itunes is just fucked.

Wednesday, 17 August 2011

Shrink a KVM disk image

This only applies to images in the qcow2 format and does not apply to raw images.


First, we should clear as many unwanted files as possible from the machine.

Because simply deleting files with rm does not actually remove the bits (it removes entries in the directory table) we therefore need to convert unused space to an easily compressible state.

We can do that by writing a bunch of zero's to the disk using this command;

cat /dev/zero > zero.fill;sync;sleep 1;sync;rm -f zero.fill

Next, we use qemu to shrink the file (compress unused space)

qemu-img convert -c -f qcow2 source.img -O qcow2 dest.img

Friday, 12 August 2011

HOWTO: Direct mapping with autofs

I wrote an article on autofs for creating indirect mounts a while back but now I need to mount a directory in the / (root) directory of a machine.

To do this I will use autofs in "direct mapping" mode.

First, if you don't have the automounter service installed, install it now.

sudo apt-get install autofs

Next we need to edit the auto.master file and add a line to tell it which file contains our direct mapping definitions;

sudo vi /etc/auto.master

Add this line;

/- /etc/auto.direct


Now we need to create the auto.direct file;

sudo vi /etc/auto.direct

To mount "my_nfs_server" to "/nas" add this line;

/nas -rw my_nfs_server:/storage

Note: The directory "/nas" should not be created by you, it will be created automatically by autofs


Restart the automounter service;

sudo service autofs restart

Check to see if it has worked;

brettg@zen:$ ls /nas

files movies music pictures
brettg@zen:$ df -h
my_nfs_server:/storage 1.4T 126G 1.2T 10% /nas

Tuesday, 19 July 2011

Repair GRUB

After doing a dist-upgrade to Ubuntu Natty I was left with a machine that simply booted to the grub menu and went no further.

This is how I fixed it.

First, boot up into a live CD and open a shell prompt.

Change to superuser

sudo -i

Issue the following commands;

mkdir ~/tmp
mount /dev/sda1 ~/tmp
mount -o bind /dev ~/tmp/dev
mount -o bind /sys ~/tmp/sys
mount -o bind /proc ~/tmp/proc
chroot ~/tmp bash
grub-install /dev/sda
update-grub

Reboot the system and you should be OK.

Friday, 24 June 2011

HOWTO: Setup an NFS server and client for LDAP

In this example I am going to setup a shared home directory to hold user homes. You would typically use this if you are using a centralised LDAP server to authenticate users.

Pre-requisites:
A standard Ubuntu server with working network and pingable by name.

You have relocated your local "sudo" user out of the default /home directory.


Configure the Server.

Note:
We are going to use an NFS server to centrally locate our users home directories. Build or select one of your existing Ubuntu servers to act as the host.

My server is called nfs.tuxnetworks.com and I have made sure that it can be pinged by name by my LAN clients.


Login to your NFS server as root;

Install the server software;

~# apt-get install nfs-kernel-server

Create a folder for the user home directories;

~# mkdir -p /store/ldaphomes

To export the directory edit your exports file;

~# vi /etc/exports/

Add this line;
/store/ldaphomes          *(rw,sync,no_subtree_check,no_root_squash)


Restart the NFS server;

~# service nfs-kernel-server restart

Configure the Client.

Install the NFS client;

~# apt-get install nfs-common

We are going to mount our NFS share on /home;

Note:
If you have any home directories in /home, these will become hidden under the mounted directory. Ideally there will be no existing users in /home because you will have shifted your local admin user somewhere else.


Edit your fstab file;

~$ sudo vi /etc/fstab

Add a line like this;
nfs.tuxnetworks.com:/store/ldaphomes      /home  nfs defaults 0 0


Note:
If your /home directory was already being mounted to a block device then you should comment this entry out in your fstab file.

Mount the directory;

~$ sudo mount /home

You can check that it has worked using the df command

nfs:/exports/ldaphomes
                     961432576 153165824 759428608  17% /home


And thats it!

Thursday, 23 June 2011

HOWTO: Change your default user account to a system account

When you deploy a new Ubuntu installation, the first user it creates (uid=1000) will be given sudo privileges.

Sometimes it is desirable to have a specific "admin" user on your system that is separate from your normal user accounts which are located in the uid=1000+ range.

For example, if you are setting up an LDAP network.

Unfortunately, you can't set the uid manually during the initial installation process but you can change it afterwards.

Note:
If you make a mistake during this procedure it is possible to lock yourself out of the system completely. This is not such an issue if this is a freshly installed system but if it is already up and running in some sort of role, then you need to be extra careful. You have been warned!

I am working here with a fresh Lucid server install, and my uid=1000 user is called "sysadmin".

Login to a console session as root;

~$ sudo -i

Manually edit your passwd file;

~# vi /etc/passwd

At the end of the file will be the entry for the "sysadmin" account;

sysadmin:x:1000:1000:system admin,,,:/home/sysadmin:/bin/bash

Change the two "1000"'s to "999";

sysadmin:x:999:999:system admin,,,:/home/sysadmin:/bin/bash

Make the same change in the "group" file;

vi /etc/group

Change the "sysadmin" line to;

sysadmin:x:999:

Changing the uid of a user will break the permissions in their home directory;
~# ls -al /home/sysadmin
total 32
drwxr-xr-x 3 1000 1000 4096 2011-06-23 13:34 .
drwxr-xr-x 3 1000 1000 4096 2011-06-23 13:32 ..
-rw------- 1 1000 1000 48 2011-06-23 13:34 .bash_history
-rw-r--r-- 1 1000 1000 220 2011-06-23 13:32 .bash_logout
-rw-r--r-- 1 1000 1000 3103 2011-06-23 13:32 .bashrc
drwx------ 2 1000 1000 4096 2011-06-23 13:33 .cache
-rw-r--r-- 1 1000 1000 675 2011-06-23 13:32 .profile
-rw-r--r-- 1 1000 1000 0 2011-06-23 13:33 .sudo_as_admin_successful
-rw------- 1 1000 1000 663 2011-06-23 13:34 .viminfo

You can fix that by issuing the following commands;

~# chown sysadmin:sysadmin /home/sysadmin
~# chown sysadmin:sysadmin /home/sysadmin/.*


When we setup LDAP later we will want to mount /home to an NFS share. Unfortunately, when we do this we will overwrite our sysadmin's home folder! Let's move it to the root ("/") directory.

~# mv /home/sysadmin /

We will need to change the path in the passwd file;

~# vi /etc/passwd

Change it from;

sysadmin:x:999:999:sysadmin,,,:/home/sysadmin:/bin/bash

to this;

sysadmin:x:999:999:sysadmin,,,:/sysadmin:/bin/bash

Check that all is well;
~# ls -al /sysadmin
total 32
drwxr-xr-x 3 sysadmin sysadmin 4096 2011-06-23 13:34 .
drwxr-xr-x 23 root root 4096 2011-06-24 11:29 ..
-rw------- 1 sysadmin sysadmin 48 2011-06-23 13:34 .bash_history
-rw-r--r-- 1 sysadmin sysadmin 220 2011-06-23 13:32 .bash_logout
-rw-r--r-- 1 sysadmin sysadmin 3103 2011-06-23 13:32 .bashrc
drwx------ 2 sysadmin sysadmin 4096 2011-06-23 13:33 .cache
-rw-r--r-- 1 sysadmin sysadmin 675 2011-06-23 13:32 .profile
-rw-r--r-- 1 sysadmin sysadmin 0 2011-06-23 13:33 .sudo_as_admin_successful
-rw------- 1 sysadmin sysadmin 663 2011-06-23 13:34 .viminfo


On another console, confirm that you can login as the sysadmin user.

You should get a proper bash prompt;

sysadmin@galileo:~$

Note:
If your system has a GUI login, be aware that the logon screen will not display usernames for users with a UID of less than 1000. To login using the "sysadmin" account in such a case, you would need to type the name in to the username field manually.

Tuesday, 21 June 2011

Getting Up To Speed With IPv6: Get Your LAN Clients Online

This is the latest installment in my series of getting IPv6 working on your network.

Pre-requisites: A router with a working Hurricane Electric IPv6 Tunnel

OK, We will be working on your IPv6 enabled router.

Start by logging in to a console session as root;

sudo -i

First we must enable IPv6 forwarding.

Edit this file;

vi /etc/sysctl.conf

Uncomment this line;

net.ipv6.ip_forward=1

Because we are needing our LAN clients to route out to the Internet they will need to be on their own subnet. Take a look at the "Tunnel Details" page for your tunnel at the Hurricane Electric website.

Mine looks like this;


See the section called "Routed IPv6 Prefixes"?

Note down the address for the "Routed /64:" subnet.

For routing to work, just like IPv4, our server must have a static IP address in that subnet.

Edit your interfaces file;

vi /etc/network/interfaces

Add the following lines;
#IPV6 configuration
iface eth0 inet6 static
address 2001:470:d:1018::1
netmask 64
gateway 2001:470:c:1018::2


You will notice that I have chosen to use the "1" address in my routed subnet and the default gateway is set to be the address of my local end of the IPv6 tunnel.

At this point you should reboot the router, and then log back in again as root.

On IPv6 we don't need to use DHCP to provide addresses to our LAN clients (although we can if we want to). Instead of being given an address, our clients will create their own addresses based on the network prefix that our router will advertise on the LAN. This is done using a program called radvd (Router Advertisment Daemon).

Install radvd;

apt-get install radvd

To configure raddvd we need to create the following file;

vi /etc/radvd.conf

Enter the following code;
interface eth0 { 
AdvSendAdvert on;
MinRtrAdvInterval 3;
MaxRtrAdvInterval 10;
prefix 2001:470:d:1018::/64 {
AdvOnLink on;
AdvAutonomous on;
AdvRouterAddr on;
};
};


Note that the prefix here is the same subnet prefix that we used in the previous step (sans the "1" address we added).

Now we can start the radvd service;

service start raddvd

You should now be able to go to a LAN client, refresh the IP address and see that you have a proper IPv6 address!

Lets take a look at a clients address;;
ifconfig eth0
eth0 Link encap:Ethernet HWaddr 52:54:00:64:cf:4d
inet addr:10.1.1.61 Bcast:10.1.1.255 Mask:255.255.255.0
inet6 addr: 2001:470:d:1018:5054:ff:fe64:cf4d/64 Scope:Global
inet6 addr: fe80::5054:ff:fe64:cf4d/64 Scope:Link

As you can see, our LAN client now has an IPv6 Address in our routed subnet.

Try a ping to google;
ping6 ipv6.google.com -c 4
PING ipv6.google.com(2404:6800:4006:802::1012) 56 data bytes
64 bytes from 2404:6800:4006:802::1012: icmp_seq=1 ttl=54 time=444 ms
64 bytes from 2404:6800:4006:802::1012: icmp_seq=2 ttl=54 time=440 ms
64 bytes from 2404:6800:4006:802::1012: icmp_seq=3 ttl=54 time=436 ms
64 bytes from 2404:6800:4006:802::1012: icmp_seq=4 ttl=54 time=437 ms


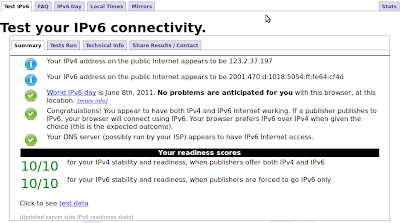
At this point you should be able to browse on your client to ip6-test.com and test your IPv6 again.


If all is good, you will get 10/10 tests right. If your DNS provider let's you down and you get a 9 don't worry too much, we will cover that topic later.

OK, so your clients now have routable IPv6 address's which is great. However this does introduce some important security related concerns that we must address.

Normally your LAN clients are protected from outside miscreants because they are behind NAT and can't be reached from outside your network.

With IPv6 there is no NAT so all your machines can be reached directly. If you have access to a IPv6 enabled machine outside of your own network try pinging the IP address of one of your LAN clients. You will find that it responds without hesitation. This is especially problematic for any Windows clients on your LAN. Windows listens on a ridiculous number of open ports by default which in turn exposes these clients to attacks from the outside world.

Again from the outside network. try doing "nmap -6 to an address on your LAN. Look at all those listening ports that are wide open to the Internet!

Fortunately, it is not hard to block the Internet from getting to your LAN. In fact it works exactly the same as iptables.

If you already have an iptables script then add some lines similar to this;
LAN=eth0
IP6WAN=ip6tunnel

# Allow returning packets for established sessions
ip6tables -A INPUT -m state --state ESTABLISHED,RELATED -j ACCEPT
ip6tables -A FORWARD -m state --state ESTABLISHED,RELATED -j ACCEPT

# Accept ALL packets coming from our local networks
sudo /sbin/ip6tables -A INPUT -i $LAN -j ACCEPT
sudo /sbin/ip6tables -A INPUT -i lo -j ACCEPT
sudo /sbin/ip6tables -A FORWARD -i $LAN -j ACCEPT

# Allow all traffic out from this host
ip6tables -A OUTPUT -j ACCEPT

# Drop all other traffic from WAN
ip6tables -A INPUT -i $IP6WAN -j DROP
ip6tables -A FORWARD -i $IP6WAN -j DROP

As you can see, it is no different than using iptables, apart from the name of course.

With your firewall in place, try doing another nmap -PN -6 scan to your client and this time you should see something like this;
nmap -PN  -6 2001:470:d:1018:5054:ff:fe64:cf4d

Starting Nmap 5.00 ( http://nmap.org ) at 2011-06-21 12:23 EST
All 1000 scanned ports on 2001:470:d:1018:5054:ff:fe64:cf4d are filtered

Nmap done: 1 IP address (1 host up) scanned in 201.41 seconds

Monday, 20 June 2011

HOWTO: Mounting shares with autofs

This is my slightly modified version of the official Ubuntu documentation.

Normally I mount my NFS shares the old way by putting a line in my fstab file.

This does have some drawbacks, particularly when a share is rarely used, or when an NFS server disappears for whatever reason and leaving a hung share.

There is another way to manage your NFS share, and that is using autofs.

autofs is a program for automatically mounting directories on an as-needed basis. Auto-mounts are mounted only as they are accessed, and are unmounted after a period of inactivity. Because of this, automounting NFS/Samba shares conserves bandwidth and offers better overall performance compared to static mounts via fstab.

This article describes configuring autof with indirect mapping. I wrote another article on how to configure direct mapping here

Here's how to get it working.

First up, we need to install autofs from the Ubuntu repositories;

sudo apt-get install autofs

I keep all my mounted filesystems in a directory called /store. Of course you can use what ever directory you like.

autofs will create any mountpoints as they are required, all we need to do is to tell it where to create them.

Edit your auto.master file;

sudo vi /etc/auto.master

Add a line like this;

/store /etc/auto.store

What that line says is that the directory /store is managed by the file /etc/auto.store

Let's create the auto.store file now;

sudo vi /etc/auto.store

I want to mount an export called "archive" which is on the server "nfs". This is the line I enter;

archive nfs:/store/archive

The first word "archive", is the mount point that will be created in the /store directory and the rest is the server name and export.

Make sure you create the store directory;

sudo mkdir /store

Restart autofs;

sudo service autofs restart

Check to see if it is working;
ls /store/archive

audio ebooks homes iso lost+found video


Eureka!

For more information on autofs including more detailed technical details, see the documentation here.

FIX: Boxee Plays in Black and White

After recently getting Boxee to work on Ubuntu Natty I discovered a new problem. It seems that everything that plays does so in black & white.

To fix it you need to edit a file in your Boxee profile;

vi ~/.boxee/UserData/guisettings.xml

Find "rendermethod" in the XML code.

Change the enclosed value from "0" to "1"

<rendermethod>1</rendermethod>

Sunday, 19 June 2011

HOWTO: Boxee on 11.04 Natty

These are the steps I took, which is based on the work done by Maxo.

First up, you need the Debian installer from the Boxee website. If you don't already have it go ahead and download it then place it in your home directory. I'm using the AMD64 package, which is called boxee-0.9.22.13692.x86_64.modfied.deb

Login to a console, we will be working only in our home directory.

Run these commands;

dpkg-deb -x boxee-0.9.22.13692.x86_64.modfied.deb boxee
dpkg-deb --control boxee-0.9.22.13692.x86_64.modfied.deb boxee/DEBIAN


Now we need to edit the file that lists the dependencies;

vi boxee/DEBIAN/control

Find libxmlrpc-c3 in this file and append -0 (that's a zero) to the end of it so that it now says "libxmlrpc-c3-0".

That's the only change we need to make but we do need to create a new Debian package file now that we have fixed the dependency problem.

dpkg -b boxee boxee-0.9.22.13692.x86_64.natty.deb

Before we can install Boxee, we will need to manually install all the dependencies;

sudo apt-get install libcurl3 libsdl-image1.2 libsdl-gfx1.2-4 liblzo2-2 \
libdirectfb-1.2-9 libnss3-1d flashplugin-nonfree libhal-storage1 screen \
msttcorefonts libtre5 libmad0 libxmlrpc-c3-0 libnspr4-0d xsel libmms0 libenca0


With our dependencies installed we can now install our modified package;

sudo dpkg -i boxee-0.9.22.13692.x86_64.natty.deb

And with that you should have a working Boxee on your Ubuntu Natty system.

It would be nice if the Boxee guys would update their packages occasionally but I guess the reality is that they want to make you purchase a "Boxee Box" instead.

This is the trouble with being at the mercy of the source code owner I guess. If Boxee were open source somebody would have already rebuilt the packages and we wouldn't have to dick around like this in the first place.

Update: I don't know if this is Natty specific bug, but I ran into another problem where Boxee would play video in black and white. If that happens to you, here is how to fix it.

When Upgrades Go Bad

Recently I decided to do a bit of a hardware refresh on my home server. This involved the purchase of an AMD E-350 based motherboard to replace my old Atom D510.

Unfortunately things went slightly awry when I realised that my existing server used a Compact Flash to IDE adaptor and the new board I had bought had no IDE interface.

DOH!

I ended up having to replace the Compact Flash adapter with a spare SSD that I had lying around and do an entire OS reinstall.

It was then that I struck another problem when I discovered that I couldn't find a 10.04 Server CD anywhere.

So, with my server in pieces and no Internet access I was forced to install Natty 11.04 x64 Desktop to get the thing back up and running.

It was my intention to convert this desktop install to something resembling a server install by installing the server kernel and removing all the Gnome, Unity and X packages.

Then I had another bright idea. I have an Acer Revo running Boxee as a HTPC sitting right next to the server. What if, I thought, I leave the desktop on the server?

If I did that then I could get rid of the Revo and run Boxee directly on the server.

Brilliant!

So, off I go to the Boxee site to get the x64 binary and while there I note that they still haven't updated their packages from over a year ago. That's the sort of thing that really annoys me about closed source software but as yet there is nothing open source that is anywhere near as slick as Boxee, so I guess I'm stuck using it for now.

But I digress.

I also note that the Boxee site only specifies packages for Lucid and Maverick, there is no mention of Natty at all. Hmmmm.

Undaunted, I go ahead and download the Maverick deb package.

However, when I go to install the package I strike my next problem;

"Dependency is not satisfiable: libxmlrpc-c3"

Damn!

A quick google search and I find this site and this site

It seems that some genius at Debian or Ubuntu has decided to rename the package from "libxmlrpc-c3" to "libxmlrpc-c3-0".

I really hate that.

The good news is that you can edit the Boxee deb package to change the dependency so it looks for the new name.

I followed the instructions provided by Maxo but because I was working in a remote ssh session things worked a bit differently. Maxo used Ubuntu Software Centre which worked out all the dependencies for him.

dpkg wouldn't do that. Normally this is OK, because you can simply use apt-get install -f to fix any outstanding unbroken dependencies but in this case all apt-get install -f wanted to do was remove Boxee again. The only way to get things working was to install all the dependencies first and then install Boxee.

Eventually everything worked out OK, and you can do it yourself using the instructions here.

Wednesday, 15 June 2011

Managing Deluge Daemon

I use Deluge bit torrent client on a couple of headless machines. There's not much to it, you can learn how to set it up here

However up until now I've been manually bringing it up and down at the command line, it's not hard but I thought I'd streamline it a bit by making a script.

Download or copy+paste this script into a file called "torrents" and make it executable;

#!/bin/bash

FLAG="/tmp/torrents_on"
UPDATE_FIREWALL="/store/scripts/firewall"

# Checking for dependancies
if [ ! ${DELUGED=`which deluged`} ] ; then echo "ERROR : Can't find 'deluged' on your system, aborting" ; exit 1; fi
if [ ! ${DELUGE_WEB=`which deluge-web`} ] ; then echo "ERROR : Can't find 'deluge-web' on your system, web interface will be disabled" ; exit 1; fi

DELUGED_PID=`ps ax | grep "${DELUGED}" | grep -v grep | awk '{print $1}'`
if [ "${DELUGED_PID}" = "" ] ; then DELUGED_PID=0 ; fi

DELUGE_WEB_PID=`ps ax | grep "${DELUGE_WEB}" | grep -v grep | awk '{print $1}'`
if [ "${DELUGE_WEB_PID}" = "" ] ; then DELUGE_WEB_PID=0 ; fi

case "$1" in
start)
if [ ! $DELUGED_PID -gt "0" ] ; then
deluged
nohup deluge-web > /dev/null 2>&1 &
touch $FLAG
$UPDATE_FIREWALL
exit 0
else
echo "Deluged is already running (PID $DELUGED_PID)"
exit 1
fi
;;

stop)
if [ ! $DELUGED_PID = "0" ] ; then
kill $DELUGED_PID
kill $DELUGE_WEB_PID
rm $FLAG
$UPDATE_FIREWALL
exit 0
else
echo "Deluged is not running"
exit 1
fi
;;

status)
if [ $DELUGED_PID -gt "0" ] ; then
ps ax | grep deluge | grep -v grep
exit 0
else
echo "Deluged is not running"
exit 0
fi
;;

*)
echo "Usage: torrents {start|stop|status}"
exit 1
;;
esac


The script will open/close ports on your firewall as required assuming you modify the UPDATE_FIREWALL variable with the correct location of your firewall script and modify that script to include something like this;
# Flush tables before re-applying ruleset
sudo /sbin/iptables --flush

# Bittorrent traffic
if [ -f /tmp/torrents_on ] ; then
sudo /sbin/iptables -A INPUT -p tcp --dport 58261 -j ACCEPT
sudo /sbin/iptables -A INPUT -p udp --dport 58261 -j ACCEPT
fi

#

# Drop all other traffic from WAN
sudo /sbin/iptables -A INPUT -i $WAN -j DROP
sudo /sbin/iptables -A FORWARD -i $WAN -j DROP

The above firewall script is for illustraion purposes and shouldn't be used as is. Make sure you modify use a script that suits your own network.

Once installed, you can now use the script to control deluged and the deluge web interface from the command line using this syntax;

torrents {start|stop|status}

Enjoy!

Thursday, 2 June 2011

HOWTO: Compiz Themes Using Emerald

This is one of those things that is way harder to figure out than it should be. Getting Emerald working is extremely simple, when you know how.

Figuring out the "how" is the hard part.

Fortunately, for you, I've done the hard part.

The main problem is to do with a command "emerald --replace" which must be always running to enable Emerald themes to be used. There are a lot of guides and forum answers out on teh inter00bs that suggest adding the command as a "Startup Application" in System > Preferences. That doesn't work. Some other guides reckon you need something called "fusion-icon" running in your notifications tray. That may work too but it is not necessary.

Here's what to do.

Pre-requisites:
* Ubuntu or Debian desktop, I'm using Lucid x64 but that's not important.
* 3D graphics driver with Compiz enabled and working.

We'll start off by installing some packages;

sudo apt-get install emerald compizconfig-settings-manager

Open Compiz Settings Manager;

System > Preferences > CompizConfig Settings Manager

Click the "Effects" category

Ensure "Window Decoration" is ticked and then click it.

In the "Command" text box, take note that it currently says;

/usr/bin/compiz-decorator

Change the text so that it says;

/usr/bin/emerald --replace

And that my friends is the secret sauce to get things working properly!

Note:
To disable Emerald, simply return to here and click the "brush" icon at the RHS to restore the default setting

You can now exit compizconfig-settings-manager.

You will need to restart your X server at this point. The easiest way is to just restart the machine.

OK, once you have booted up again browse on over to
http://compiz-themes.org and grab yourself a theme.

With theme in hand, open the "Emerald Themer" application;

System > Preferences > Emerald Theme Manager

Import your theme using the "Import" button.

Once it's imported, the theme will appear in the theme list. Simply click it and watch your window decorations magically change.

Easy? Well, it should be.

Wednesday, 1 June 2011

Purge Your System Of Mono

Updated 18/6/2012 for Mint 13 "Maya" / Ubuntu 12.04 "Precise"

If you are not overly happy with having a bastard child of Microsoft installed on your systems and the potential patent issues that may arise from its use then this simple one liner will purge your system of mono and anything that depends on it.

Make sure you read the list of packages to be removed that the apt-get command provides before you go ahead and do it.

sudo apt-get purge mono-4.0-gac

This will remove the following from your system.
The following packages will be REMOVED:
  banshee* libappindicator0.1-cil* libdbus-glib1.0-cil* libdbus1.0-cil* libgconf2.0-cil* libgdata1.9-cil*
  libgkeyfile1.0-cil* libglib2.0-cil* libgmime2.6-cil* libgtk-sharp-beans-cil* libgtk2.0-cil* libgudev1.0-cil*
  liblaunchpad-integration1.0-cil* libmono-addins-gui0.2-cil* libmono-addins0.2-cil* libmono-cairo4.0-cil*
  libmono-corlib4.0-cil* libmono-i18n-west4.0-cil* libmono-i18n4.0-cil* libmono-posix4.0-cil*
  libmono-security4.0-cil* libmono-sharpzip4.84-cil* libmono-system-configuration4.0-cil*
  libmono-system-core4.0-cil* libmono-system-drawing4.0-cil* libmono-system-security4.0-cil*
  libmono-system-xml4.0-cil* libmono-system4.0-cil* libmono-zeroconf1.0-cil* libnotify0.4-cil* libtaglib2.0-cil*
  mint-meta-cinnamon-dvd* mono-4.0-gac* mono-gac* mono-runtime* tomboy*
0 upgraded, 0 newly installed, 36 to remove and 0 not upgraded.
After this operation, 34.3 MB disk space will be freed.


If you are happy to lose that stuff, in particular the Banshee audio player then go ahead hit "y" to nuke Mono once and for all*

* Actually, next time you do a dist-upgrade you are likely to have the mono infection return to your system. In such cases just reapply this treatment.

Tuesday, 31 May 2011

FIX: 404 Errors Using apt-cacher-ng

I recently upgraded my Ubuntu server to Debian Squeeze, but not without difficulties.

The first problem was with apt-cacher-ng. Well, actually it was two problems. The first involves an apparent difference between how Ubuntu and Debian configure their apt clients to use a proxy.

On Ubuntu I have always used /etc/apt/apt.conf with a single line pointing to my proxy like so;

Acquire::http { Proxy "http://apt:3142"; };

This didn't seem to work with Debian clients, the fix is to put the same line into a file at /etc/apt/apt.conf.d/01proxy.

Actually you can call the file anything you like, even "apt.conf" but naming the file like this fits in with normal Debian conventions better, which can't be a bad thing.

The second issue I had was with Ubuntu clients using the apt-cacher-ng proxy installed on a Debian server.

I kept getting "404 Not Found" errors every time I did an apt-get update on the (lucid) clients.

Google was no help. There were a few people who were having the same problem but no answers.

Eventually I found the issue myself. There is a file in the apt-cacher-ng directory that has an error. To fix the problem you edit this file;

vi /etc/apt-cacher-ng/backends_ubuntu

and change the line so it says something like this;

http://au.archive.ubuntu.com/ubuntu/

Of course you should change it to something more local to where you are. The key here is that on my system the trailing /ubuntu/ was missing and this was causing the 404 errors.

Monday, 30 May 2011

HOWTO: Relocate LVM to a New Server

The main storage on my home server is on 2 x 2TB hard disk drives which are configured as an LVM volume.

(For a guide on configuring LVM from scratch see this article.)

My server currently runs Ubuntu 10.04 but I've decided to bite the bullet and swap it over to Debian Squeeze.

I've never moved an LVM volume to another server / OS installation so it's time to learn how to do it, I guess.

Note:
It should be obvious but I will nevertheless say it here anyway. Mucking about with file-systems is a dangerous thing to do and any misstep can lead to disastrous, catastrophic and permanent DATA LOSS! Ensure that you have adequate backups before attempting this procedure. You have been warned!

First, you need to login as root.

sudo -i

Get the details for your current LVM Volume Group(s);

vgdisplay
--- Volume group ---
VG Name store
System ID
Format lvm2
Metadata Areas 2
Metadata Sequence No 6
VG Access read/write
VG Status resizable
MAX LV 0
Cur LV 1
Open LV 0
Max PV 0
Cur PV 2
Act PV 2
VG Size 3.64 TiB
PE Size 4.00 MiB
Total PE 953862
Alloc PE / Size 953862 / 3.64 TiB
Free PE / Size 0 / 0
VG UUID 9zwhOn-3Qs6-aPTo-kqQ4-RL4p-ICTA-l56Dsz


As you can see, I have a single volume group called "store".

Let's see what Logical Volumes are in the Volume Group;
lvdisplay
--- Logical volume ---
LV Name /dev/store/archive
VG Name store
LV UUID 80eFYi-n0Z7-9br1-bbfg-1GQ6-Orxf-0wENTU
LV Write Access read/write
LV Status available
# open 1
LV Size 3.64 TiB
Current LE 953862
Segments 2
Allocation inherit
Read ahead sectors auto
- currently set to 256
Block device 254:0

We can see that there is a single volume 'archive' in the group.

Check your fstab for the line pertaining to your LVM volume;

cat /etc/fstab

The relevant line in my case is this;

UUID=057272e5-8b66-461a-ad18-c1c198c8dcdd /store/archive ext3 errors=remount-ro 0 1

Make sure you keep this info at hand for later on.

It so happens that I am sharing this volume using NFS so I need to stop my NFS server;

service nfs-kernel-server stop

so that I can unmount it.

umount /store/archive/

Now I need to mark the VG as inactive;
vgchange -an store
0 logical volume(s) in volume group "store" now active

Next I prepare the volume group to be moved by "exporting" it;
vgexport store
Volume group "store" successfully exported

Let's take another look at the volume group details;
vgdisplay
Volume group store is exported
--- Volume group ---
VG Name store
System ID
Format lvm2
Metadata Areas 2
Metadata Sequence No 5
VG Access read/write
VG Status exported/resizable
MAX LV 0
Cur LV 1
Open LV 0
Max PV 0
Cur PV 2
Act PV 2
VG Size 3.64 TiB
PE Size 4.00 MiB
Total PE 953862
Alloc PE / Size 953862 / 3.64 TiB
Free PE / Size 0 / 0
VG UUID 9zwhOn-3Qs6-aPTo-kqQ4-RL4p-ICTA-l56Dsz

As you can see, the VG Status has changed to "exported"

Now you can shutdown your system and relocate the drives or reinstall the OS. In my case my OS is installed on a removable Compact Flash card which I have already pre-installed Debian Squeeze. i.e. Here is one I prepared earlier!

OK, once our server has rebooted we need to install LVM and associated utils;

sudo apt-get install lvm2 dmsetup reiserfsprogs xfsprogs

We activate the volume group using the vgchange command again;
vgchange -a y
Volume group "store" is exported

Import the volume group into our new system with the 'vgimport' command;

vgimport store

Let's have a look at our logical volumes again;
lvdisplay
--- Logical volume ---
LV Name /dev/store/archive
VG Name store
LV UUID 80eFYi-n0Z7-9br1-bbfg-1GQ6-Orxf-0wENTU
LV Write Access read/write
LV Status available
# open 0
LV Size 3.64 TiB
Current LE 953862
Segments 2
Allocation inherit
Read ahead sectors auto
- currently set to 256
Block device 254:0

That looks good. It should be the same as it was in the old system and the LV status should be "available"

Take the line from the fstab file on the old server and add it to the new server;

vi /etc/fstab

Paste the line at the end;

UUID=057272e5-8b66-461a-ad18-c1c198c8dcdd /store/archive ext3 errors=remount-ro 0 1

Recreate the mountpoint if it doesn't already exist;

mkdir -p /store/archive

And finally we can mount the drive;

sudo mount /store/archive/

We can check that it is mounted OK with df;
df
Filesystem 1K-blocks Used Available Use% Mounted on
/dev/sda1 7387992 930944 6081752 14% /
tmpfs 1025604 0 1025604 0% /lib/init/rw
udev 1020856 184 1020672 1% /dev
tmpfs 1025604 0 1025604 0% /dev/shm
/dev/mapper/store-archive
3845710856 2358214040 1292145880 65% /store/archive


And that's it! Glad I didn't need to resort to my backups . . .

Wednesday, 25 May 2011

HOWTO: Basic Server Build with Debian

So, you want to turn that old unloved cast away PC you rescued from the garbage skip at work into a server and you were wondering how to go about it eh?

Well my friend, you have come to the right place, read on.

Hardware Requirements;

Any modest old cast aside hardware will do, something with a reasonable amount of RAM, Minimum 8GB hard disk and some manner of pentium processor will be fine. It is important that it is reliable of course.
Pro Tip: Using a plain old 8GB Compact Flash with a suitable adaptor such as this one can give you a router that is more reliable, a lot less noisy and with far lower power requirements than some old clunker hard disk drive you found in the back shed. However, it's also fun to reuse that old junk in a useful fashion thereby saving it from certain death at the local metal recyclers so go with whatever floats your boat.

I've been procrastinating for some time about shifting from a Ubuntu to a more vanilla debian focus and I have decided now is the time to bite the bullet and go ahead. Accordingly, I will log my steps as the first in what I hope will be a series of articles (or updates to my previous articles) that will guide you through building a server that is suitable for a typical SOHO or home user using Debian Linux.

This article will cover installation and basic configuration of a basic headless server with openssh and a static IP address along with a few other comforts that I generally add to all my installs.

OK, to start the process off we need to download an ISO image.

I am going to use Debian 6 so I have downloaded this ISO but if you don't want to use BitTorrent there are other options. The CD I am using is the AMD64 6.0.1 "netinst" CD. This is a minimal ISO that will download the majority of the packages we require during the install. Because we will be installing a very basic system to start off with this won't amount to a lot so it should be OK. With the additional installation of apt-cacher-ng that we will also do any packages installed later on will be cached locally and therefore downloaded only once. However, if you prefer to download a full set of the CD's or DVD's instead then of course you should go right ahead and do that instead.

OK, once you have downloaded an ISO and burnt it to CD, put it in the machine you intend to use as a server and boot it up. You may have to modify your system CMOS settings to allow this to happen. (Do I need to tell you this?)

Step 1: Installing the base system

At the boot menu choose "text install" because hey, this is a server and you don't even have a mouse connected right? Right?

Now, I'm sure you don't need me to hand hold you through all the screens asking about where you are located, what language you speak and what to call the server. If you do then you probably should give up now because a headless server is not what you want to be playing with.

Just enter all the obvious answers, tailored to suit your specific locale and requirements of course. When asked for a domain, enter your domain name (if you have one) otherwise just make one up. Make sure it is clearly a fake domain such as "example.org" or "myhome.net" and not one that is used (aka owned) by somebody out on the Internet that you might want to connect to in future. Using google.com or debian.org is NOT recommended!

You will be asked to enter a root password. Make sure you don't forget it!

Note:
A word on disk partitioning. There are many ways to approach this. A lot of the time people just plonk everything in one big partition. They usually do this because that is how they do it in Windows. This is not the best way to partition a drive.

The best way is to separate (at least) your home directories (/home) from the root (/) partition. This will make things far easier for you down the track if you need to do upgrades, reinstall the OS or anything else where you want to keep your users homes intact.

In my example however, I am going break my own advice and choose the simplest option and just plonk everything into one big fat partition.

I'm doing it this way because I usually use a small disk for the root (/)partition (in this case an 8Gb CF card) and I am going to manually move my user homes to a separate (much larger) hard disk later on. This means that I am not too concerned with fancy partition schemes for the moment. I am also going to ignore LVM for the same reason.


So, with that in mind, when you are asked about partitioning choose "Guided - User entire disk" followed by "All files in one partition"

The only other bit of interest is the "Software Selection" screen.

Since we are setting up a server, we don't want a full blown GUI getting in the way and bogging things down so make sure you uncheck that option at the top of the list.

Finally answer "yes" to install the grub bootloader.

When the install process completes the machine will restart.

Step 2: Configure a basic server

Login as the root user using the password that you entered during the install process.

Assuming that you have a working DHCP server currently on your network the installer will have configured your server to use DHCP.

Let's check our network connectivity before we charge ahead.

Try pinging Google by name;

ping -c 4 www.google.com
PING www.l.google.com (74.125.237.18) 56(84) bytes of data.
64 bytes from 74.125.237.18: icmp_req=1 ttl=53 time=16.5 ms
64 bytes from 74.125.237.18: icmp_req=2 ttl=54 time=16.2 ms
64 bytes from 74.125.237.18: icmp_req=3 ttl=54 time=16.2 ms
64 bytes from 74.125.237.18: icmp_req=4 ttl=54 time=16.7 ms

--- www.l.google.com ping statistics ---
4 packets transmitted, 4 received, 0% packet loss, time 15639ms
rtt min/avg/max/mdev = 16.213/16.448/16.705/0.226 ms

You should see ping responses as per above otherwise you will need to resolve this issue before you continue.

We are going to install some extra packages now. If you are intending on using more than one debian PC on your network then it is a good idea to cache those packages so you don't need to keep downloading them over and over again on every PC you build.

We do that by installing apt-cacher-ng;

apt-get install apt-cacher-ng

We need to tell the system to download packages through apt-cacher-ng instead of directly.

Create a file "apt.conf"

vi /etc/apt/apt.conf

Add the following line;

Acquire::http: { Proxy "http://localhost:3142"; };

Update aptitude;

apt-get update

This should complete without errors otherwise you will need to resolve this issue before you continue.

Now, if you are like me you will prefer to login to this server via SSH rather than camping in front of a text console. Also, having used Ubuntu for quite some time I have become accustomed to sudo. I also prefer vim, so I add that as well.

Install openssh server, sudo and vim;

apt-get install sudo openssh-server vim

To allow a user to use sudo, add them to the sudo group;

usermod -a -G sudo brettg

That's it for our base system, but we have one more thing to do.

Step 3 : Setting a static IP address

Because this will be a server (and possibly a router), we really don't want to be using a DHCP provided address. Static address's are where all the server action is at.

Before we change stuff, we need to gather a bit of information about our current network.

Query your network interface (assuming eth0);
ifconfig eth0
eth0 Link encap:Ethernet HWaddr 00:0c:29:f4:88:50
inet addr:10.1.1.102 Bcast:10.1.1.255 Mask:255.255.255.0
inet6 addr: fe80::20c:29ff:fef4:8850/64 Scope:Link
UP BROADCAST RUNNING MULTICAST MTU:1500 Metric:1
RX packets:19022 errors:0 dropped:0 overruns:0 frame:0
TX packets:4389 errors:0 dropped:0 overruns:0 carrier:0
collisions:0 txqueuelen:1000
RX bytes:9278651 (8.8 MiB) TX bytes:395157 (385.8 KiB)

Take note of the Mask and Bcast details.

Query our routing table;
netstat -rn
Kernel IP routing table
Destination Gateway Genmask Flags MSS Window irtt Iface
10.1.1.0 0.0.0.0 255.255.255.0 U 0 0 0 eth0
0.0.0.0 10.1.1.254 0.0.0.0 UG 0 0 0 eth0


Take note of your default route (ie Destination 0.0.0.0), which in this case is 10.1.1.254 and the network address which in this example is 10.1.1.0

This is all we need to configure a static address.

Note:
You should use an IP address that is not part of the existing DHCP pool. Check your current router and determine the pool that is in use. When I configure a small network I generally set my pool to be .100 thru 199 which leaves everything under 100 and over 199 available for static use. I will be using 10.1.1.1 here which is, of course, outside my DHCP pool.

To change your network interface edit your "interfaces" file;

vi /etc/network/interfaces

This should currently have a section like this;
allow-hotplug eth0
iface eth0 inet dhcp

We want to change it so that it looks like this;
allow-hotplug eth0 eth0
iface eth0 inet static
address 10.1.1.1
netmask 255.255.255.0
network 10.1.1.0
broadcast 10.1.1.255
gateway 10.1.1.254

Note: On Ubuntu you will have auto eth0 not allow-hotplug eth0

When the changes are made you should reboot your server. You should confirm that the eth0 interface has an address of 10.1.1.1 using the ifconfig eth0 command and also check that you have name resolution and Internet access by pinging www.google.com.

Step 4 : Modifying our system for CF users (optional)

If, like me, you are using a (non-SSD) Flash RAM based drive then you might want to make a few adjustments to your system to compensate for the lack of wear leveling in the drive.

Follow this guide to extend the lifespan of your Flash drive now.

So, assuming you have an IP address and your pings respond as expected then congratulations, you have built yourself the basis of a handy little debian server!

The next step you take should be to configure your server as a router

Adjust Your File System To Accomodate Flash Drives

I am using a Compact Flash card for my root partition on a small Atom based server at home. I find this to be a good way to build an inexpensive, quiet, low powered server however it does introduce a few special problems due to the absence of any wear leveling logic as used by proper SSD hard drives.

I use a slot loaded CF card which makes it easy for me to pull the card to make an image (using dd) or swap over to another OS without unscrewing the case. However using Compact Flash or a plain old USB thumb drive might be cheap and handy but it also brings to head some issues related to how the system reads and writes to the card.
Flash memory is not happy about writing to the same memory cell over and over and over so consequently any cell that is treated in this manner will eventually die. Proper SSD's work around this by incorporating special logic that shifts sectors around automatically so that all the memory cell's do roughly the same amount of work. This is called "wear leveling". Dumb old Compact Flash cards don't do wear leveling but there are some steps we can take to ameliorate this problem to some degree.

These days most Linux systems use EXT3 or EXT4 file systems which are both journaling file systems. This means that every time a file is accessed the journal is updated to record that action. This makes it easier for the file-system to keep track of reads and writes and detect when an error may have occurred. Unfortunately it also means lots of writing (to the journal) which means a premature death for our CF card.

The older EXT2 FS does not do journaling which means we will have less protection but seeing that we are not using the CF to store data (just for the OS) I consider it an acceptable "risk".

To use EXT2 edit your fstab file;

vi /etc/fstab

On the line pertaining to your root (/) file-system change the "ext3" to "ext2", it's that simple.

Another thing that a normal system does is update each file every time it is read with a time-stamp. That's another thing we want to stop happening.

On the same line, find where it says errors=remount-ro and append to that column ,noatime.

Here is an example line;
UUID=68a316e0-8071-47e3-b31d-718a7be2e498 / ext2 errors=remount-ro,noatime 0 1

Another area that gets written to quite a bit is the /tmp directory.

We can move that off the Flash drive and into RAM using tmpfs. This has the bonus of improving overall system performance by a small amount.

Add this line to your fstab;
tmpfs /tmp tmpfs  size=256000m,exec,nosuid 0 0

You can tweak the amount of RAM to use but I wouldn't go below 128Mb personally.

And finally, once you install a normal hard disk to your server you should relocate your swap file over to a partition located on it. For now I am simply going to disable swap altogether. To do that just stick a comment "#" at the start of the relevant line.

And that's it, these changes should allow your "dumb" Flash drive based OS installation to live a reasonably long and happy life. My current server has been going strong for about 2 years now, fingers crossed!

FIX: ALT+PrtScn Not Working

In the latest version(s) of Ubuntu there is a stupid bug where ALT+PrtScn no long works

The fix is simple, in a console enter the following code;

sudo sysctl -w kernel.sysrq=0

This will disable the "SysRq" key, which apparently is interfering with Alt+PrtScn.

Just another reason to switch over to vanilla Debian

Modify The System-Wide PATH

For years, when I wanted to add a directory to the system path I have been adding something like PATH=$PATH:/new/path to the end of /etc/profile.

This is because this is the "answer" that many people provide when you do a Google search on how to do it.

However, in Ubuntu the default path is not set in this file so I have always had the feeling that this is not the "right" way to do this. There must be somewhere else that holds this info?

Well I just discovered it.

The system path is set in /etc/environment.

Here is the default path;

brettg@jupiter:~$ cat /etc/environment
PATH="/usr/local/sbin:/usr/local/bin:/usr/sbin:/usr/bin:/sbin:/bin:/usr/games"


To add a path simply stick a colon at the end followed by your new path;

PATH="/usr/local/sbin:/usr/local/bin:/usr/sbin:/usr/bin:/sbin:/bin:/usr/games:/my/new/path"

Easy peasy! (When you know how)

This does not apply to debian (squeeze), the system path is set in /etc/profile same as other systems.